第六章练习 Expanding the Passport App - 扩展护照App的功能
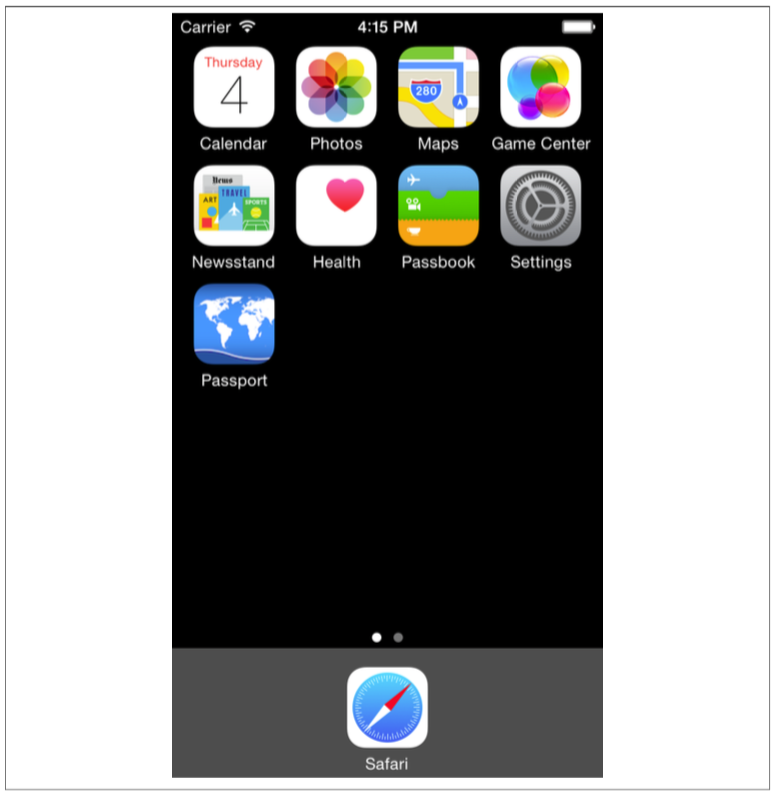
这次的练习我们将扩展第五章开发的Passport App,在本次练习中,我们将全面过一遍Debugger和documentation(文档),最后,我们还会给App增加应用图标和启动界面。见图6-11。
Page 174 | Chapter 6 : Next Steps : Debugging, Documentation, and App Icons
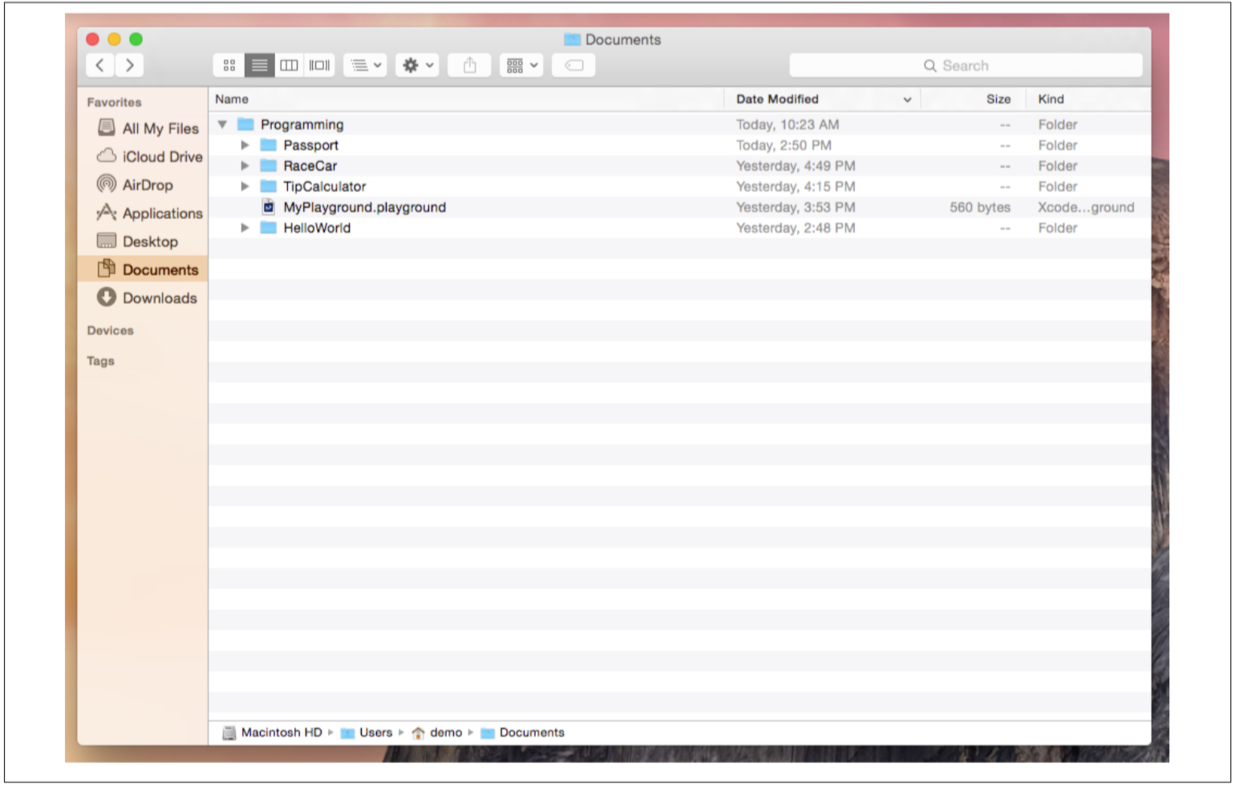
首先我们找到Passport工程文件夹(见图6-12),打开Passport文件夹,文件夹中有三部分,两个文件夹和一个Passport.xcodeproj文件。
Exercise: Expanding the Passport App | Page 175
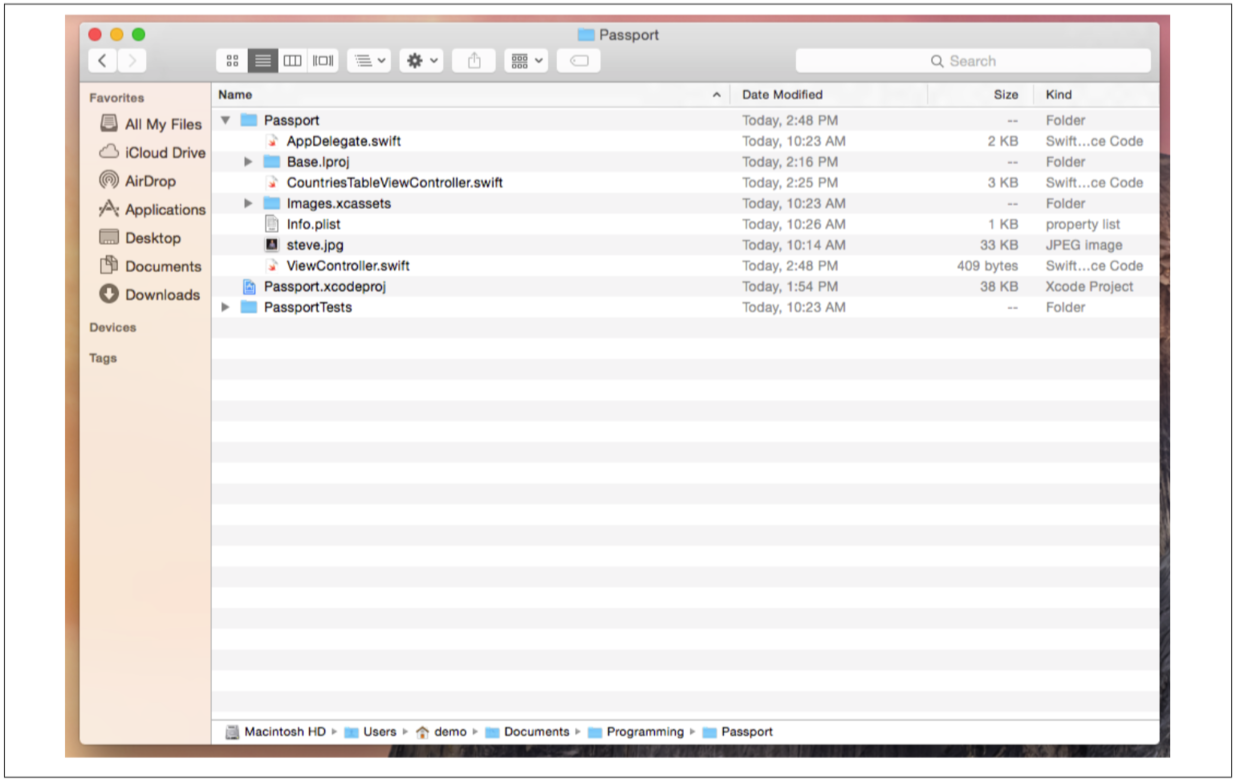
见图6-13的文件,这些文件构成了Passport应用,在这里的文件层次和你Xcode中Project Navigator看到的文件层次是不一样的。
Page 176 | Chapter 6 : Next Steps : Debugging, Documentation, and App Icons
三个.swift文件,文件名中包含其代表的类,Base.lproj文件夹中有.storyboard文件,image.xcassets文件夹中保存App的图标,Info.plist文件用来存储App的一些细节,例如版本号,bundle identifier(Bundle ID)。双击扩展名.xcodeproj的文件打开工程。
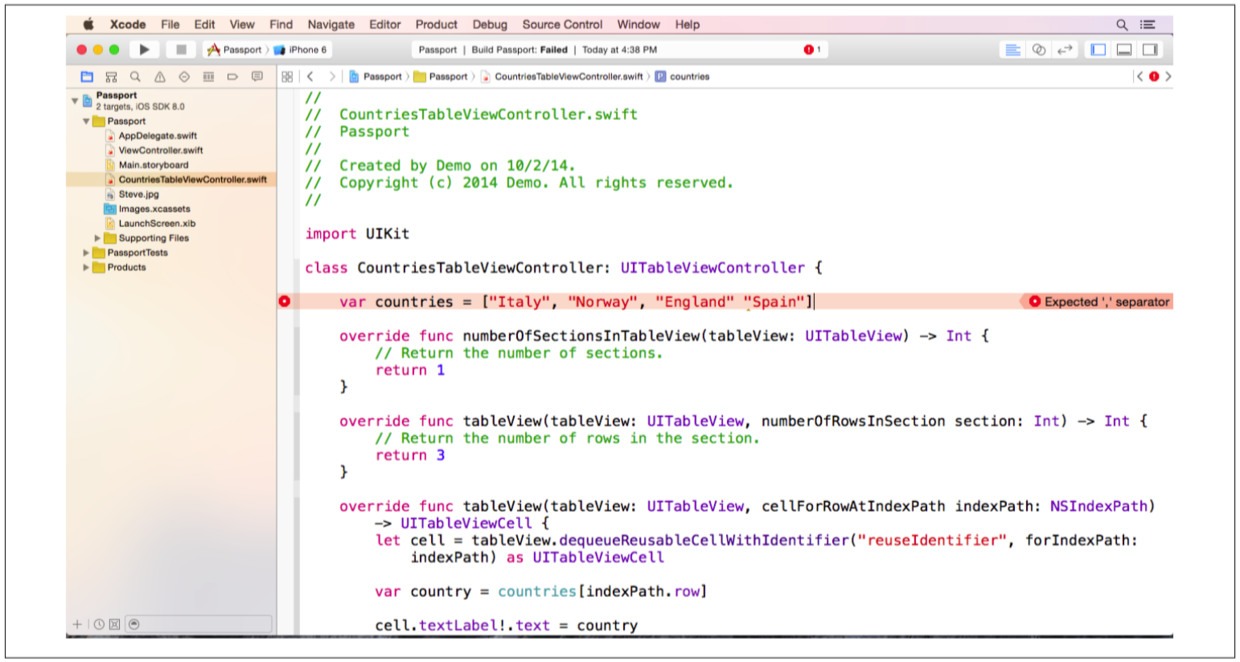
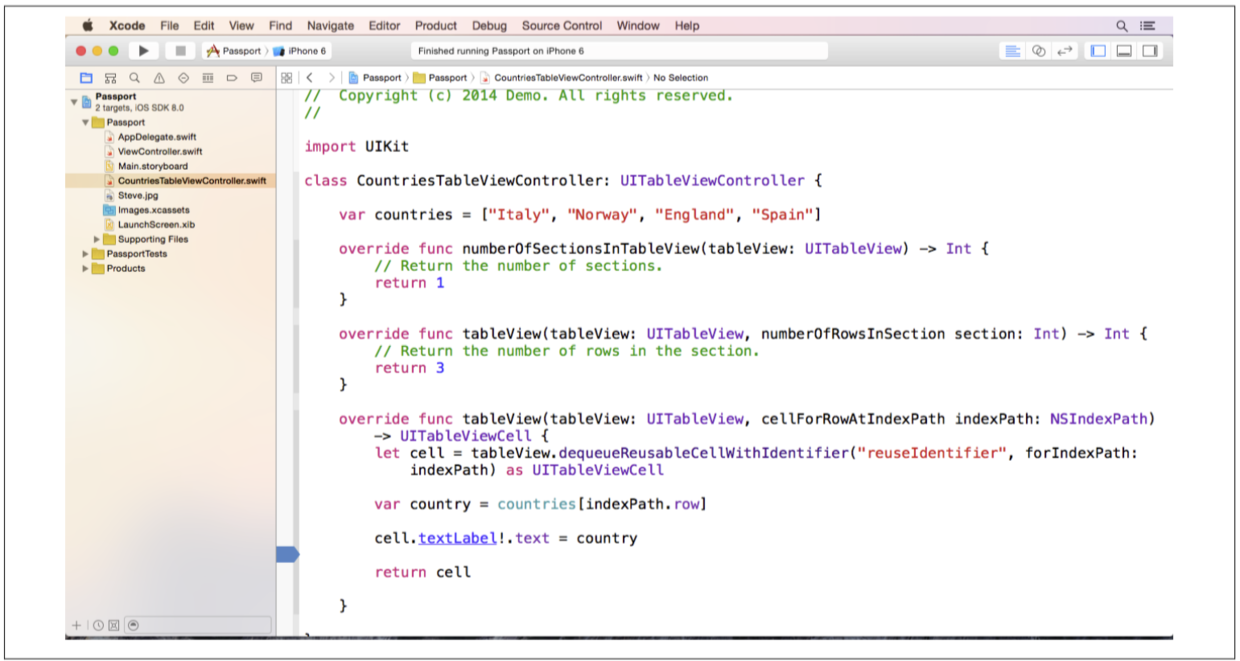
我们要在Passport App中增加国家,然后显示在国家清单中。点开CountriesTableViewController.swift文件,把鼠标放到数组中England后面,然后输入“Spain”,要在数组的中括号中输入,然后点击Play按钮(Command+R)。
哎呀,报错了。点击左侧的红点,然后出现Fix-It弹出框(见图6-14)。点击Fix-It,自动在数组中添加一个逗号。然后点击Play按钮(Command+R)。
Exercise: Expanding the Passport App | Page 177
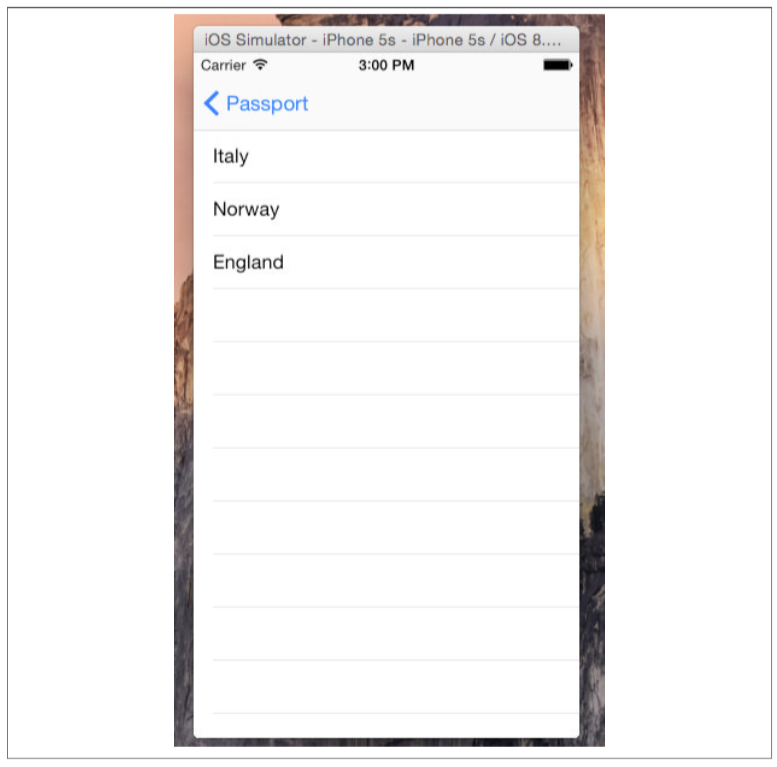
App启动后,点击Show Countries按钮,查看刚刚增加的国家(见图6-15)。
Page 178 | Chapter 6 : Next Steps : Debugging, Documentation, and App Icons
Spain并没有出现在table view中,关闭iOS模拟器,然后回到CountriesTableViewController.swift文件。
滑倒cellForRowAtIndexFath方法,把鼠标放到cell.textLabel.text = country下方,Editor左侧有一条灰色的区域,这块区域叫做gutter,点击cell.textLabel.text = country下方那行的gutter,生成一个breakpoint的(断点)。
生成breakpoint后会在gutter上出现一个蓝色的箭头,这个蓝色箭头就是breakpoint(图6-16)。breakpoint会暂停程序运行,允许你一步一步的检查每一行代码。用这种方法,可以能够找到问题所在。点击Play按钮(Command+R)。
Exercise: Expanding the Passport App | Page 179
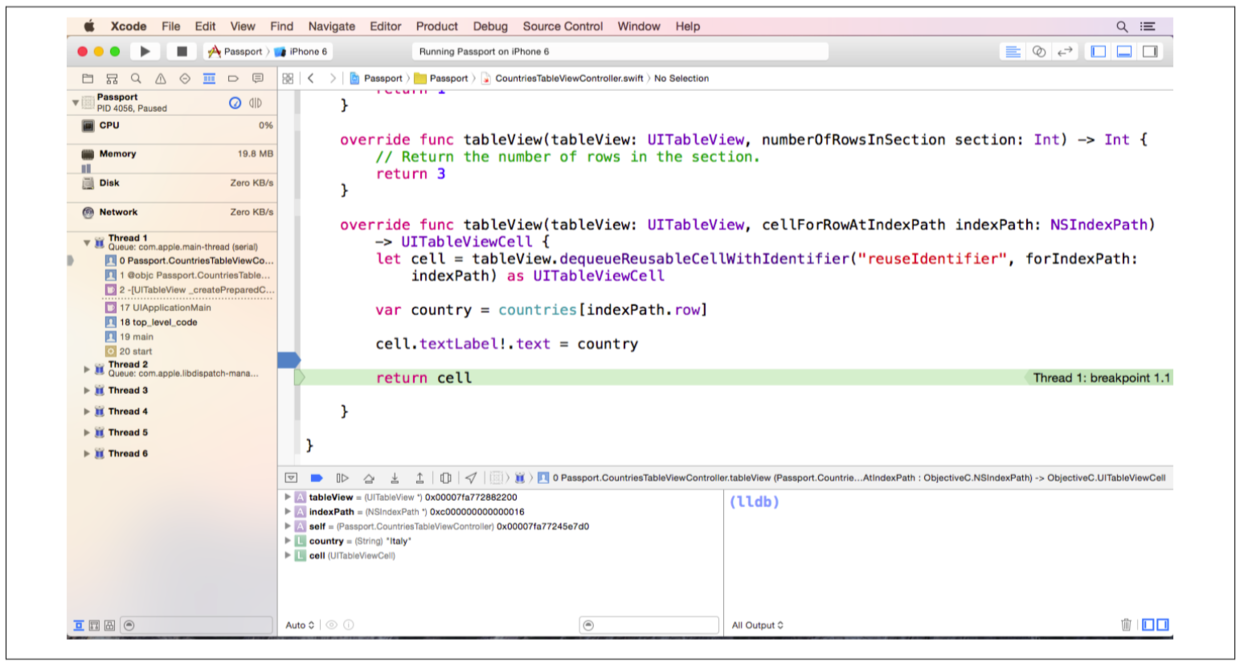
App启动后,点击Show Countries按钮,这时模拟器会隐藏起来,Xcode出现在最前面,有breakpoint(断点)的那行代码会高亮绿色背景,Debugger也会出现在Xcode最下方(见图6-17)。
Page 180 | Chapter 6 : Next Steps : Debugging, Documentation, and App Icons
Debugger左侧的清单列出了所有的变量,这个清单叫做variables view。请注意,country变量目前是设置成了Italy。点击debug tool(调试工具栏)中的Continue按钮,从左往右数第三个按钮,外表看起来像是Play按钮。
下载的指示会立即出现,然后breakpoint所在的那行代码被标注出绿色背景,再看country这个变量,现在被设置成了Norway。然后继续点击debug tool(调试工具栏)中的Continue按钮。
下载的指示会立即出现,然后breakpoint所在的那行代码被标注出绿色背景,再看country这个变量,现在被设置成了England。然后继续点击debug tool(调试工具栏)中的Continue按钮。
这时模拟器再次出现了,table view中还是和上次同样的三个国家。调试区域显示cellForRowAtIndexFath方法被调用了三次。
打开CountriesTableViewController.swift文件,去掉gutter上的breakpoint(断点),看一下numberOfRowsInSection方法,返回值是3,这意味着table view中只有3个cell,把返回值那行代码修改为:
return countries.count
这行代码会让cell的数量等于数组countries中的元素数量。这样,countries数组中每个元素都会有一个cell,所有的元素现在都能够显示到table view中了。点击Play按钮(Command+R)。
恭喜你!你刚刚修复了你第一个bug!
Documentation文档
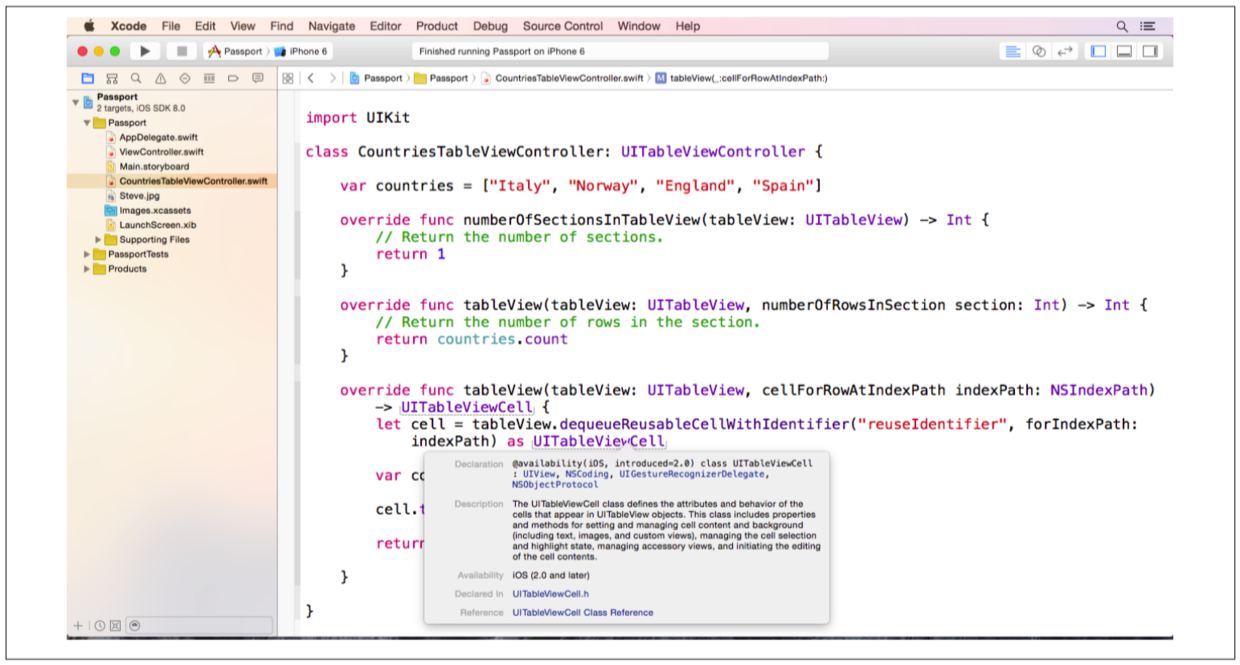
要是cell还能显示更多东西就好了。找到cellForRowAtIndexFath方法,按住Option键,点击方法中UITableViewCell这个词,会出现一个快速帮助框(见图6-18)。点击UITableViewCellClass链接。
Exercise: Expanding the Passport App | Page 181
出现UITableViewCell文档窗口,左侧是文档目录,往下滑找到accessoryTpye然后点击,文档会出现下面的内容:
The accessory view appears in the right side of the cell in the table view’s normal (default)state. The standard accessory views include the disclosure chevron; for a description ofvalid accessoryType constants, see UITableViewCellAccessoryType.
点击UITableViewCellAccessoryTpye,出现下列列表:
• None • DisclosureIndicator • DetailDisclosureButton • Checkmark • DetailButton
估计给每个国家增加一个check框会是不错的效果。关闭文档,把鼠标放到cell.textLabel.text = country下方,增加下方代码:
cell.accessoryType = .Checkmark
点击Play按钮(Command+R),现在tableview中每行都有checkmark了(见图6-19)。

Page 182 | Chapter 6 : Next Steps : Debugging, Documentation, and App Icons
App Icon应用图标
现在是时候给你的工程添加应用图标了。你可以从这个网站下载图标http://www.AppSchool.com/book.(这个网站我是打不开,你们去网上下载免费的图标用吧)。
Exercise: Expanding the Passport App | Page 183
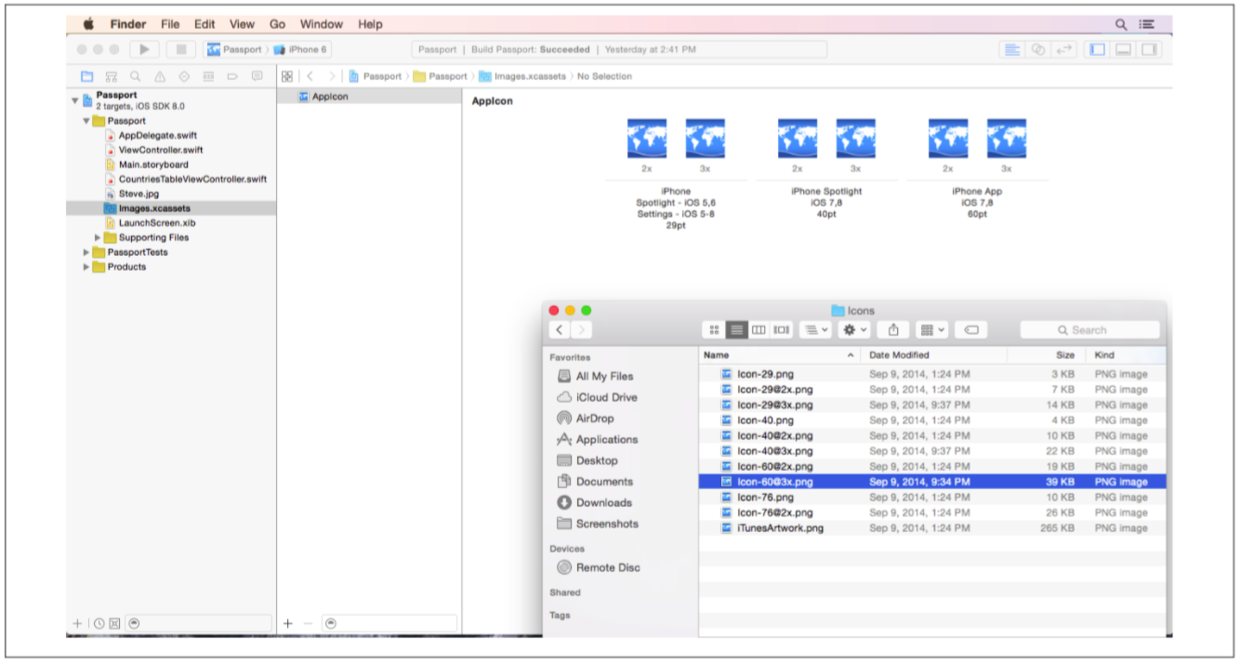
接下来,打开文件夹,把文件夹放到图6-20这个位置,正好在Xcode的右下角,打开Xcode中的Images.xcassets,点击AppIcon,把图标拖到对应的位置。

把每个文件放到对应的框中(图6-21)。
Page 184 | Chapter 6 : Next Steps : Debugging, Documentation, and App Icons
App图标添加完毕。
打开LaunchScreen.xib文件,去掉Passport Label(见图6-22)。选中Label删掉。点击Play按钮(Command+R)启动模拟器。

点击模拟器,这时顶部菜单选择Hardware -> Home,可以看到我们刚刚设置的App Icon效果(图6-23)。

Exercise: Expanding the Passport App | Page 185
如果App没有按照你想要的结果运行,或者程序有了错误或警告,不要太担心,学习的最佳方式就是试错,熟能生巧,到我们的网站上下载示例代码,对比一下代码,多试几次,直到搞定这个程序为止。
Page 186 | Chapter 6 : Next Steps : Debugging, Documentation, and App Icons