34.9. Modifying Existing Printers
To delete an existing printer, select the printer and click the Delete button on the toolbar. The printer is removed from the printer list. Click Apply to save the changes and restart the printer daemon.
To set the default printer, select the printer from the printer list and
click the Default button on the toolbar. The
default printer icon ![]() appears in the Default column of the default printer in
the list. A IPP browsed queue printer can not be set as the default printer
in the Printer Configuration Tool. To make an IPP printer
the default, add it as described in Section 34.2 Adding an IPP Printer and make it the default.
appears in the Default column of the default printer in
the list. A IPP browsed queue printer can not be set as the default printer
in the Printer Configuration Tool. To make an IPP printer
the default, add it as described in Section 34.2 Adding an IPP Printer and make it the default.
 | Note |
|---|---|
The GNOME Print Manager no longer sets user level default printers. In order to set a default printer system-wide, use the system-config-printer command, or the Printer Configuration Tool. In order for users to configure a default printer for themselves only, each user should use the GNOME Default Printer Tool, which can be found by selecting Applications (on the Panel) => Preferences => More Preferences => Default Printer. |
After adding the printer(s), the settings can be edited by selecting the printer from the printer list and clicking the Edit button. The tabbed window shown in Figure 34-12 is displayed. The window contains the current values for the selected printer. Make any necessary changes and click OK. Click Apply in the main Printer Configuration Tool window to save the changes and restart the printer daemon.
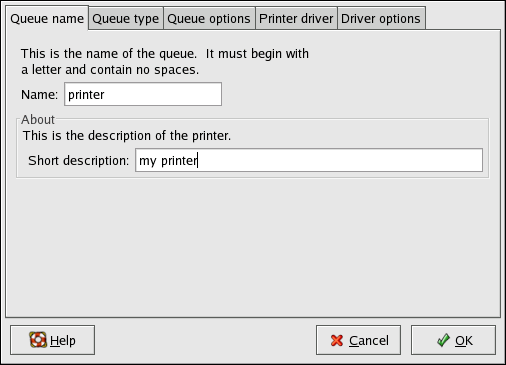
34.9.1. Queue Name
To rename a printer or change its short description, change the value in the Queue name tab. Click OK to return to the main window. The name of the printer should change in the printer list. Click Apply to save the change and restart the printer daemon.
34.9.2. Queue Type
The Queue type tab shows the queue type that was selected when adding the printer and its settings. The queue type of the printer can be changed or just the settings. After making modifications, click OK to return to the main window. Click Apply to save the changes and restart the printer daemon.
Depending on which queue type is chosen, different options are displayed. Refer to the appropriate section on adding a printer for a description of the options.
34.9.3. Printer Driver
The Printer driver tab shows which print driver is currently being used. If it is changed, click OK to return to the main window. Click Apply to save the change and restart the printer daemon.
34.9.4. Driver Options
The Driver options tab displays advanced printer options. Options vary for each print driver. Common options include:
Prerender Postscript should be selected if characters beyond the basic ASCII set are being sent to the printer, but they are not printing correctly (such as Japanese characters). This option prerenders non-standard PostScript fonts so that they are printed correctly.
If the printer does not support the fonts you are trying to print, try selecting this option. For example, select this option to print Japanese fonts to a non-Japanese printer.
Extra time is required to perform this action. Do not choose it unless problems printing the correct fonts exist.
Also select this option if the printer can not handle PostScript level 3. This option converts it to PostScript level 1.
GhostScript pre-filtering allows you to select No pre-filtering, Convert to PS level 1, or Convert to PS level 2 in case the printer cannot handle certain PostScript levels. This option is only available if the PostScript driver is used.
Page Size allows the paper size to be selected. The options include US Letter, US Legal, A3, and A4.
Effective Filter Locale defaults to C. If Japanese characters are being printed, select ja_JP. Otherwise, accept the default of C.
Media Source defaults to Printer default. Change this option to use paper from a different tray.
To modify the driver options, click OK to return to the main window. Click Apply to save the change and restart the printer daemon.