34.2. Adding an IPP Printer
An IPP printer is a printer attached to a different Linux system on the same network running CUPS or a printer configured on another operating system to use IPP. By default, the Printer Configuration Tool browses the network for any shared IPP printers. (This option can be changed by selecting Action => Sharing from the pulldown menu.) Any networked IPP printer found via CUPS browsing appears in the main window under the Browsed queues category.
If you have a firewall configured on the print server, it must be able to send and receive connections on the incoming UDP port, 631. If you have a firewall configured on the client (the computer sending the print request), it must be allowed to send and accept connections on port 631.
If you disable the automatic browsing feature, you can still add a networked IPP printer by clicking the New button in the main Printer Configuration Tool window to display the window in Figure 34-2. Click Forward to proceed.
In the window shown in Figure 34-3, enter a unique name for the printer in the Name text field. The printer name cannot contain spaces and must begin with a letter. The printer name may contain letters, numbers, dashes (-), and underscores (_). Optionally, enter a short description for the printer, which can contain spaces.
After clicking Forward, Figure 34-5 appears. Select Networked CUPS (IPP) from the Select a queue type menu.
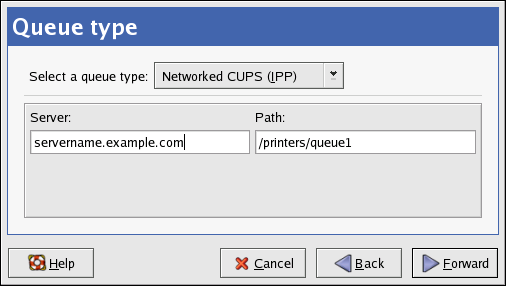
Text fields for the following options appear:
Server — The hostname or IP address of the remote machine to which the printer is attached.
Path — The path to the print queue on the remote machine.
Click Forward to continue.
Next, select the printer type. Refer to Section 34.7 Selecting the Printer Model and Finishing for details.
 | Important |
|---|---|
The networked IPP print server must allow connections from the local system. Refer to Section 34.13 Sharing a Printer for more information. |