34.6. Adding a JetDirect Printer
To add a JetDirect printer, click the New button in the main Printer Configuration Tool window. The window shown in Figure 34-1 appears. Click Forward to proceed.
In the window shown in Figure 34-3, enter a unique name for the printer in the Name text field. The printer name cannot contain spaces and must begin with a letter. The printer name may contain letters, numbers, dashes (-), and underscores (_). Optionally, enter a short description for the printer, which can contain spaces.
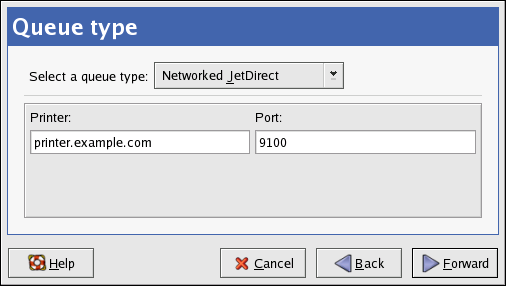
Select Networked JetDirect from the Select a queue type menu, and click Forward.
Text fields for the following options appear:
Printer — The hostname or IP address of the JetDirect printer.
Port — The port on the JetDirect printer that is listening for print jobs. The default port is 9100.
Next, select the printer type. Refer to Section 34.7 Selecting the Printer Model and Finishing for details.