Copyright (c) 1992-2011 The FreeBSD Project.
Copyright (c) 1979, 1980, 1983, 1986, 1988, 1989, 1991, 1992, 1993, 1994
The Regents of the University of California. All rights reserved.
FreeBSD is a registered trademark of The FreeBSD Foundation.
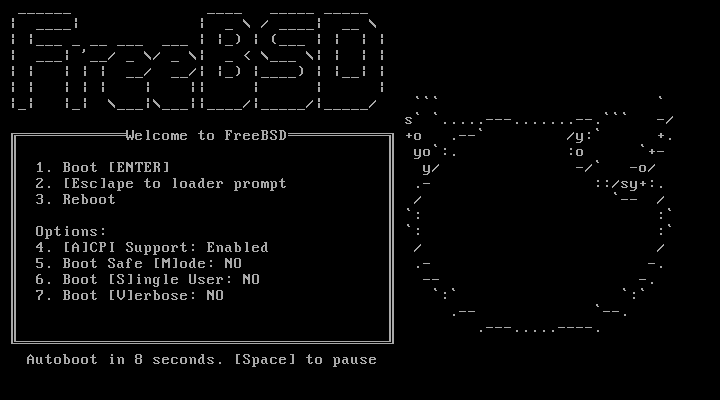
FreeBSD 9.0-RELEASE #0 r225473M: Sun Sep 11 16:07:30 BST 2011
root@psi:/usr/obj/usr/src/sys/GENERIC amd64
CPU: Intel(R) Core(TM)2 Duo CPU T9400 @ 2.53GHz (2527.05-MHz K8-class CPU)
Origin = "GenuineIntel" Id = 0x10676 Family = 6 Model = 17 Stepping = 6
Features=0xbfebfbff<FPU,VME,DE,PSE,TSC,MSR,PAE,MCE,CX8,APIC,SEP,MTRR,PGE,MCA,CMOV,PAT,PSE36,CLFLUSH,DTS,ACPI,MMX,FXSR,SSE,SSE2,SS,HTT,TM,PBE>
Features2=0x8e3fd<SSE3,DTES64,MON,DS_CPL,VMX,SMX,EST,TM2,SSSE3,CX16,xTPR,PDCM,SSE4.1>
AMD Features=0x20100800<SYSCALL,NX,LM>
AMD Features2=0x1<LAHF>
TSC: P-state invariant, performance statistics
real memory = 3221225472 (3072 MB)
avail memory = 2926649344 (2791 MB)
Event timer "LAPIC" quality 400
ACPI APIC Table: <TOSHIB A0064 >
FreeBSD/SMP: Multiprocessor System Detected: 2 CPUs
FreeBSD/SMP: 1 package(s) x 2 core(s)
cpu0 (BSP): APIC ID: 0
cpu1 (AP): APIC ID: 1
ioapic0: Changing APIC ID to 1
ioapic0 <Version 2.0> irqs 0-23 on motherboard
kbd1 at kbdmux0
acpi0: <TOSHIB A0064> on motherboard
acpi0: Power Button (fixed)
acpi0: reservation of 0, a0000 (3) failed
acpi0: reservation of 100000, b6690000 (3) failed
Timecounter "ACPI-safe" frequency 3579545 Hz quality 850
acpi_timer0: <24-bit timer at 3.579545MHz> port 0xd808-0xd80b on acpi0
cpu0: <ACPI CPU> on acpi0
ACPI Warning: Incorrect checksum in table [ASF!] - 0xFE, should be 0x9A (20110527/tbutils-282)
cpu1: <ACPI CPU> on acpi0
pcib0: <ACPI Host-PCI bridge> port 0xcf8-0xcff on acpi0
pci0: <ACPI PCI bus> on pcib0
vgapci0: <VGA-compatible display> port 0xcff8-0xcfff mem 0xff400000-0xff7fffff,0xe0000000-0xefffffff irq 16 at device 2.0 on pci0
agp0: <Intel GM45 SVGA controller> on vgapci0
agp0: aperture size is 256M, detected 131068k stolen memory
vgapci1: <VGA-compatible display> mem 0xffc00000-0xffcfffff at device 2.1 on pci0
pci0: <simple comms> at device 3.0 (no driver attached)
em0: <Intel(R) PRO/1000 Network Connection 7.2.3> port 0xcf80-0xcf9f mem 0xff9c0000-0xff9dffff,0xff9fe000-0xff9fefff irq 20 at device 25.0 on pci0
em0: Using an MSI interrupt
em0: Ethernet address: 00:1c:7e:6a:ca:b0
uhci0: <Intel 82801I (ICH9) USB controller> port 0xcf60-0xcf7f irq 16 at device 26.0 on pci0
usbus0: <Intel 82801I (ICH9) USB controller> on uhci0
uhci1: <Intel 82801I (ICH9) USB controller> port 0xcf40-0xcf5f irq 21 at device 26.1 on pci0
usbus1: <Intel 82801I (ICH9) USB controller> on uhci1
uhci2: <Intel 82801I (ICH9) USB controller> port 0xcf20-0xcf3f irq 19 at device 26.2 on pci0
usbus2: <Intel 82801I (ICH9) USB controller> on uhci2
ehci0: <Intel 82801I (ICH9) USB 2.0 controller> mem 0xff9ff800-0xff9ffbff irq 19 at device 26.7 on pci0
usbus3: EHCI version 1.0
usbus3: <Intel 82801I (ICH9) USB 2.0 controller> on ehci0
hdac0: <Intel 82801I High Definition Audio Controller> mem 0xff9f8000-0xff9fbfff irq 22 at device 27.0 on pci0
pcib1: <ACPI PCI-PCI bridge> irq 17 at device 28.0 on pci0
pci1: <ACPI PCI bus> on pcib1
iwn0: <Intel(R) WiFi Link 5100> mem 0xff8fe000-0xff8fffff irq 16 at device 0.0 on pci1
pcib2: <ACPI PCI-PCI bridge> irq 16 at device 28.1 on pci0
pci2: <ACPI PCI bus> on pcib2
pcib3: <ACPI PCI-PCI bridge> irq 18 at device 28.2 on pci0
pci4: <ACPI PCI bus> on pcib3
pcib4: <ACPI PCI-PCI bridge> at device 30.0 on pci0
pci5: <ACPI PCI bus> on pcib4
cbb0: <RF5C476 PCI-CardBus Bridge> at device 11.0 on pci5
cardbus0: <CardBus bus> on cbb0
pccard0: <16-bit PCCard bus> on cbb0
isab0: <PCI-ISA bridge> at device 31.0 on pci0
isa0: <ISA bus> on isab0
ahci0: <Intel ICH9M AHCI SATA controller> port 0x8f58-0x8f5f,0x8f54-0x8f57,0x8f48-0x8f4f,0x8f44-0x8f47,0x8f20-0x8f3f mem 0xff9fd800-0xff9fdfff irq 19 at device 31.2 on pci0
ahci0: AHCI v1.20 with 4 3Gbps ports, Port Multiplier not supported
ahcich0: <AHCI channel> at channel 0 on ahci0
ahcich1: <AHCI channel> at channel 1 on ahci0
ahcich2: <AHCI channel> at channel 4 on ahci0
acpi_lid0: <Control Method Lid Switch> on acpi0
battery0: <ACPI Control Method Battery> on acpi0
acpi_button0: <Power Button> on acpi0
acpi_acad0: <AC Adapter> on acpi0
acpi_toshiba0: <Toshiba HCI Extras> on acpi0
acpi_tz0: <Thermal Zone> on acpi0
attimer0: <AT timer> port 0x40-0x43 irq 0 on acpi0
Timecounter "i8254" frequency 1193182 Hz quality 0
Event timer "i8254" frequency 1193182 Hz quality 100
atkbdc0: <Keyboard controller (i8042)> port 0x60,0x64 irq 1 on acpi0
atkbd0: <AT Keyboard> irq 1 on atkbdc0
kbd0 at atkbd0
atkbd0: [GIANT-LOCKED]
psm0: <PS/2 Mouse> irq 12 on atkbdc0
psm0: [GIANT-LOCKED]
psm0: model GlidePoint, device ID 0
atrtc0: <AT realtime clock> port 0x70-0x71 irq 8 on acpi0
Event timer "RTC" frequency 32768 Hz quality 0
hpet0: <High Precision Event Timer> iomem 0xfed00000-0xfed003ff on acpi0
Timecounter "HPET" frequency 14318180 Hz quality 950
Event timer "HPET" frequency 14318180 Hz quality 450
Event timer "HPET1" frequency 14318180 Hz quality 440
Event timer "HPET2" frequency 14318180 Hz quality 440
Event timer "HPET3" frequency 14318180 Hz quality 440
uart0: <16550 or compatible> port 0x3f8-0x3ff irq 4 flags 0x10 on acpi0
sc0: <System console> at flags 0x100 on isa0
sc0: VGA <16 virtual consoles, flags=0x300>
vga0: <Generic ISA VGA> at port 0x3c0-0x3df iomem 0xa0000-0xbffff on isa0
ppc0: cannot reserve I/O port range
est0: <Enhanced SpeedStep Frequency Control> on cpu0
p4tcc0: <CPU Frequency Thermal Control> on cpu0
est1: <Enhanced SpeedStep Frequency Control> on cpu1
p4tcc1: <CPU Frequency Thermal Control> on cpu1
Timecounters tick every 1.000 msec
hdac0: HDA Codec #0: Realtek ALC268
hdac0: HDA Codec #1: Lucent/Agere Systems (Unknown)
pcm0: <HDA Realtek ALC268 PCM #0 Analog> at cad 0 nid 1 on hdac0
pcm1: <HDA Realtek ALC268 PCM #1 Analog> at cad 0 nid 1 on hdac0
usbus0: 12Mbps Full Speed USB v1.0
usbus1: 12Mbps Full Speed USB v1.0
usbus2: 12Mbps Full Speed USB v1.0
usbus3: 480Mbps High Speed USB v2.0
ugen0.1: <Intel> at usbus0
uhub0: <Intel UHCI root HUB, class 9/0, rev 1.00/1.00, addr 1> on usbus0
ugen1.1: <Intel> at usbus1
uhub1: <Intel UHCI root HUB, class 9/0, rev 1.00/1.00, addr 1> on usbus1
ugen2.1: <Intel> at usbus2
uhub2: <Intel UHCI root HUB, class 9/0, rev 1.00/1.00, addr 1> on usbus2
ugen3.1: <Intel> at usbus3
uhub3: <Intel EHCI root HUB, class 9/0, rev 2.00/1.00, addr 1> on usbus3
uhub0: 2 ports with 2 removable, self powered
uhub1: 2 ports with 2 removable, self powered
uhub2: 2 ports with 2 removable, self powered
uhub3: 6 ports with 6 removable, self powered
ugen2.2: <vendor 0x0b97> at usbus2
uhub8: <vendor 0x0b97 product 0x7761, class 9/0, rev 1.10/1.10, addr 2> on usbus2
ugen1.2: <Microsoft> at usbus1
ada0 at ahcich0 bus 0 scbus1 target 0 lun 0
ada0: <Hitachi HTS543225L9SA00 FBEOC43C> ATA-8 SATA 1.x device
ada0: 150.000MB/s transfers (SATA 1.x, UDMA6, PIO 8192bytes)
ada0: Command Queueing enabled
ada0: 238475MB (488397168 512 byte sectors: 16H 63S/T 16383C)
ada0: Previously was known as ad4
ums0: <Microsoft Microsoft 3-Button Mouse with IntelliEyeTM, class 0/0, rev 1.10/3.00, addr 2> on usbus1
SMP: AP CPU #1 Launched!
cd0 at ahcich1 bus 0 scbus2 target 0 lun 0
cd0: <TEAC DV-W28S-RT 7.0C> Removable CD-ROM SCSI-0 device
cd0: 150.000MB/s transfers (SATA 1.x, ums0: 3 buttons and [XYZ] coordinates ID=0
UDMA2, ATAPI 12bytes, PIO 8192bytes)
cd0: cd present [1 x 2048 byte records]
ugen0.2: <Microsoft> at usbus0
ukbd0: <Microsoft Natural Ergonomic Keyboard 4000, class 0/0, rev 2.00/1.73, addr 2> on usbus0
kbd2 at ukbd0
uhid0: <Microsoft Natural Ergonomic Keyboard 4000, class 0/0, rev 2.00/1.73, addr 2> on usbus0
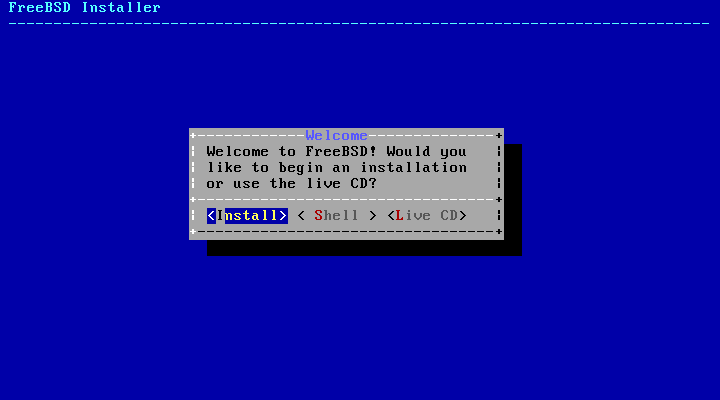
Trying to mount root from cd9660:/dev/iso9660/FREEBSD_INSTALL [ro]...